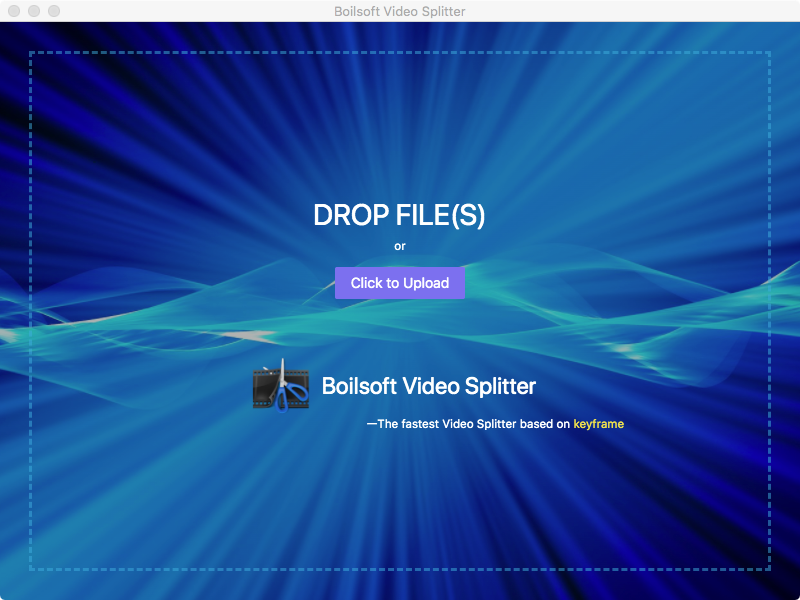
Boilsoft Video Splitter for Mac/Video Cutter
AVI Splitter - MPEG Splitter - AVI Split - MPEG Split
- Open Source Video
- Set Start Point and End Point
- Start Splitting
- Split to equal parts or equal time
- Trim Mode
Click the purple Click to Upload button to choose your video file. Alternatively , you can directly drag&drop the video file to the Video Splitter.
Step 2. Set Start Time and End Time
Click
 to play the video. When you want to set the start point, click
 and then click
![]() to set start point and
to set start point and
![]() to set end point.
to set end point.
Or you can click below red area to set start and end point. The icon in the green square only indicates current selected point, click
![]() or
or
![]() to mark it as start point or end point.
to mark it as start point or end point.
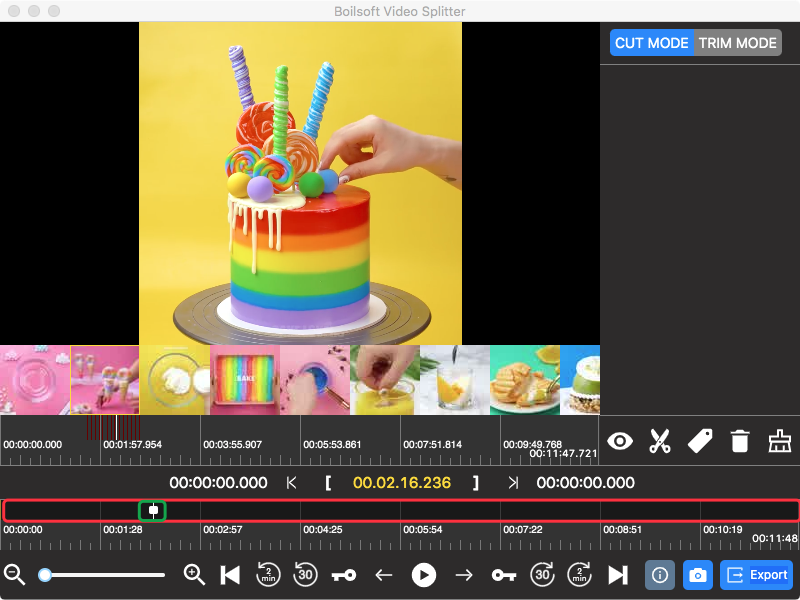
Optional : If want to minimally adjust the time setting, you can click below icons to adjust:
 move one frame backward
 move one frame forward
![]() move one keyframe backward
move one keyframe backward
![]() move one keyframe forward
move one keyframe forward
![]() rewind 30 seconds
rewind 30 seconds
![]() fast forward 30 seconds
fast forward 30 seconds
![]() rewind 2 minutes
rewind 2 minutes
![]() fast forward 2 minutes
fast forward 2 minutes
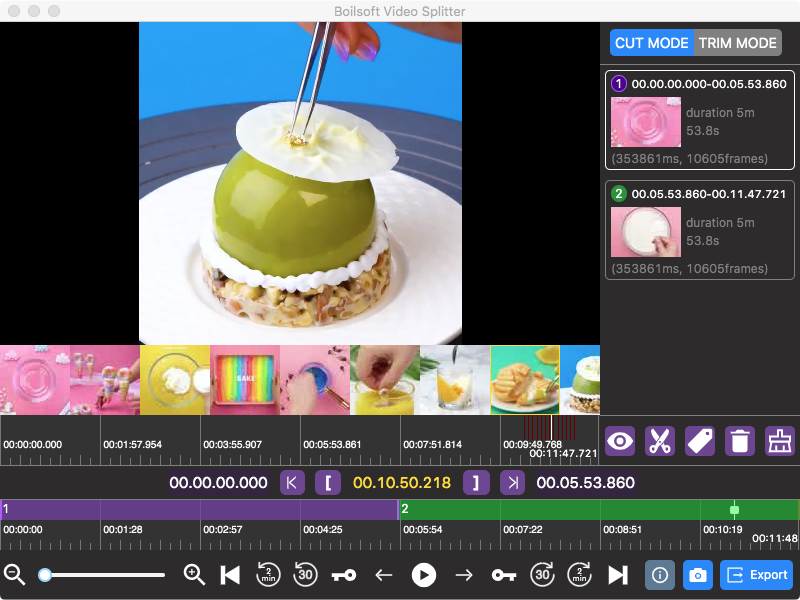
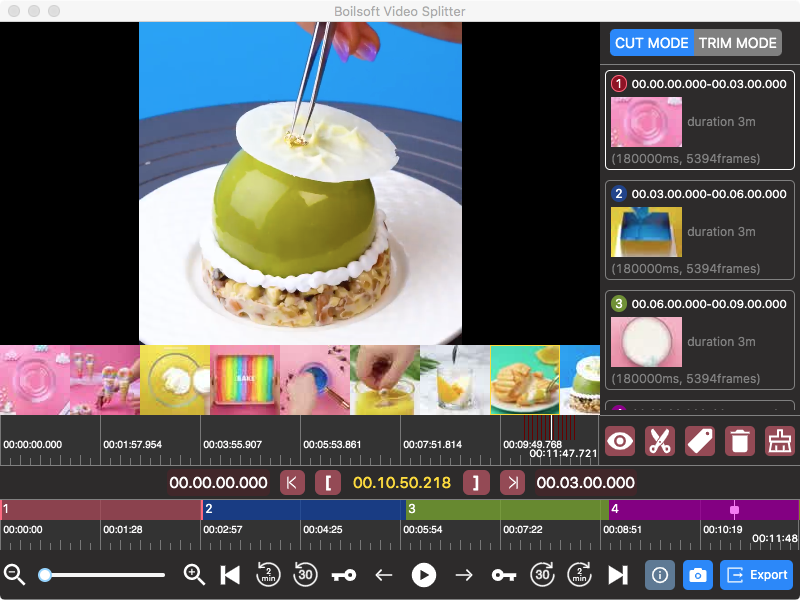
As this splitter can split an unlimited number of segments at a time, you can repeat as many times as you want. The segments will be marked with different color and listed on the right side. Click
![]() to preview current segment. Click
to preview current segment. Click
![]() to delete current segment or
to delete current segment or
![]() to delete all segments. Click
to delete all segments. Click
![]() to add tag to current segment. For example, the third segment is abhout how to make ice-cream, so I add an "ice-cream" tag.
to add tag to current segment. For example, the third segment is abhout how to make ice-cream, so I add an "ice-cream" tag.

If you have finished all segments, click
![]() to get them as separate video segments. Click
to get them as separate video segments. Click
![]() to capture a snapshot of current frame.
to capture a snapshot of current frame.
Click
![]() to split the video to several equal segments
to split the video to several equal segments
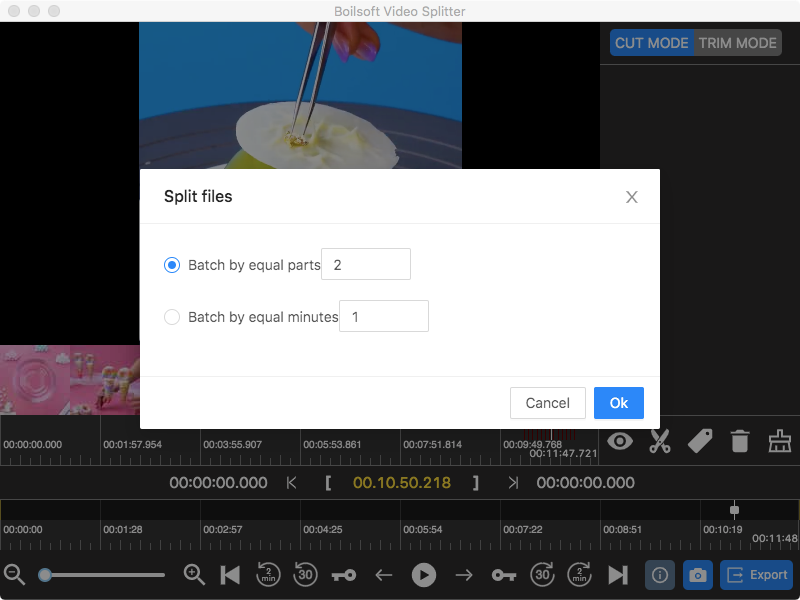
Split to multiple 3-minute segments:

Different from Cut Mode, Trim Mode allows you to trim the selected segment and preserve the left part. Select TRIM MODE on the top right corner and then select the segment that you want to trim. Then click
![]() and you will get the video without the selected segment.
and you will get the video without the selected segment.
Tutorials
Topics


Copyright © 2023 Boilsoft Systems International Inc. All rights reserved.